Note: This Thing has lots of parts. Please read the WHOLE thing!
Background of Blogging
1. View this short video from the CommonCraft guys that explains blogs "in Plain English."
2.View this PowerPoint created by Spring Branch ISD, for an overview of a blog's format and see some samples of different types of blogs you may encounter during this experience.
3. Read The 4 Cs of Blogging, a post about what to think about when setting up your blog, how to approach what you might write about, and how you will respond to others' thoughts.
Creating Your Blog
For this Discovery Activity, you may use any one of several free online blog hosting services including Blogger, Wordpress, Class Blogmeister, or Typepad.

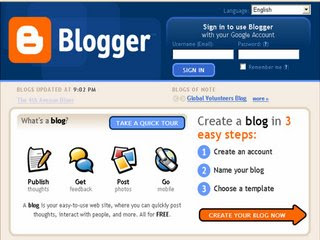
I am recommending Blogger. It comes through the district firewall and is consistently available (no down time). Take the Quick Tour of Blogger for a look at it before starting.
To start your blog:
1. Create an account. You will need an email address. It does not need to be a gmail account, but can be. We recommend that you decide on one e-mail account that you will use as you register for many activities in other "Things".
2. Name your blog. The portion that goes into the address is "permanent." It can not be changed once set up. The blog title that appears on the actual page can be changed or updated to meet the needs of your blog. A good rule of thumb...short and sweet and easy to type!
3. Choose a template (or skin.) You can always go back and select another one if you don't care for the look of your blog.
 When setting up your preferences, please allow for comments by anyone. You CAN set it up where you have to approve them before they show.
MORE HELP with setting up your blog
Remember to identify EACH of your post titles with the word "Thing" & # that goes with what you are writing about. Each Thing should be written in a separate post.
Now that your blog is set up:
1. Go back to Thing #2 and write (in a new blog post) your thoughts regarding the habit among the 7 & 1/2 that is easiest for you and the one which is hardest. Include any other thoughts about lifelong learning.
2. Create an avatar -- a representation of yourself.Go to Yahoo Avatars and create a character representing things about yourself. Here's a chance for your creativity to come out! Have fun!
3. Save your avatar and export to your blog.
HELP: Here's how to export your avatar to your blog.
a) When you are on your Avatars.Yahoo.com page, go to "home" tab and look to the right column.
b) One of the options is: "EXPORT: Use your avatar in web pages and blogs and more." Click there.
c) Then, in the Center of the page, one option is your avatar's HTML code. Copy the code.
d) Go to your blog (Sign in. When you first sign in, there is an option to add a post OR manage posts, settings, or layout; Go to "LAYOUT." You will see various page elements.)
e) Paste (Control V) the HTML code in the PAGE ELEMENT marked "HTML/Java Script."
f) Then move that PAGE ELEMENT to wherever you want your avatar to appear on your blog.
You can do this...yes, you can! a little more help maybe ?
3. Write about the process about setting up your blog and your avatar in a new blog post for Thing #3. Have you looked at anyone else's blog...have you made a comment or ask a question?
Seems like a lot here, but you are over the hardest part and ready to write about all the new things you will be seeing and doing. Have fun!
EXTRA CREDIT: Create a VOKI! Go to http://www.voki.com/. Add it as a GADGET to your blog!

No comments:
Post a Comment